Wing Tips: Using Docker with Wing Pro 8
Wing Pro 8 significantly improved support for working with Python code that runs on containers like those provided by Docker, making it easier to configure projects that use Docker, and adding support for creating new Docker environments during project creation.
Prerequisites
Before you can work with Docker you will need to download and install it.
On Windows and macOS, downloading Docker Desktop from the Docker website is the easiest way to install it. Be sure to launch the Docker Desktop after you install it, so the daemon is started.
On most Linux distributions, Docker CE (the free community edition) can be installed with the docker-engine package as described here.
You should also install Wing Pro if you don't already have it.
Project Configuration
You can either create a new Docker container along with a new Wing project or use an existing container configuration.
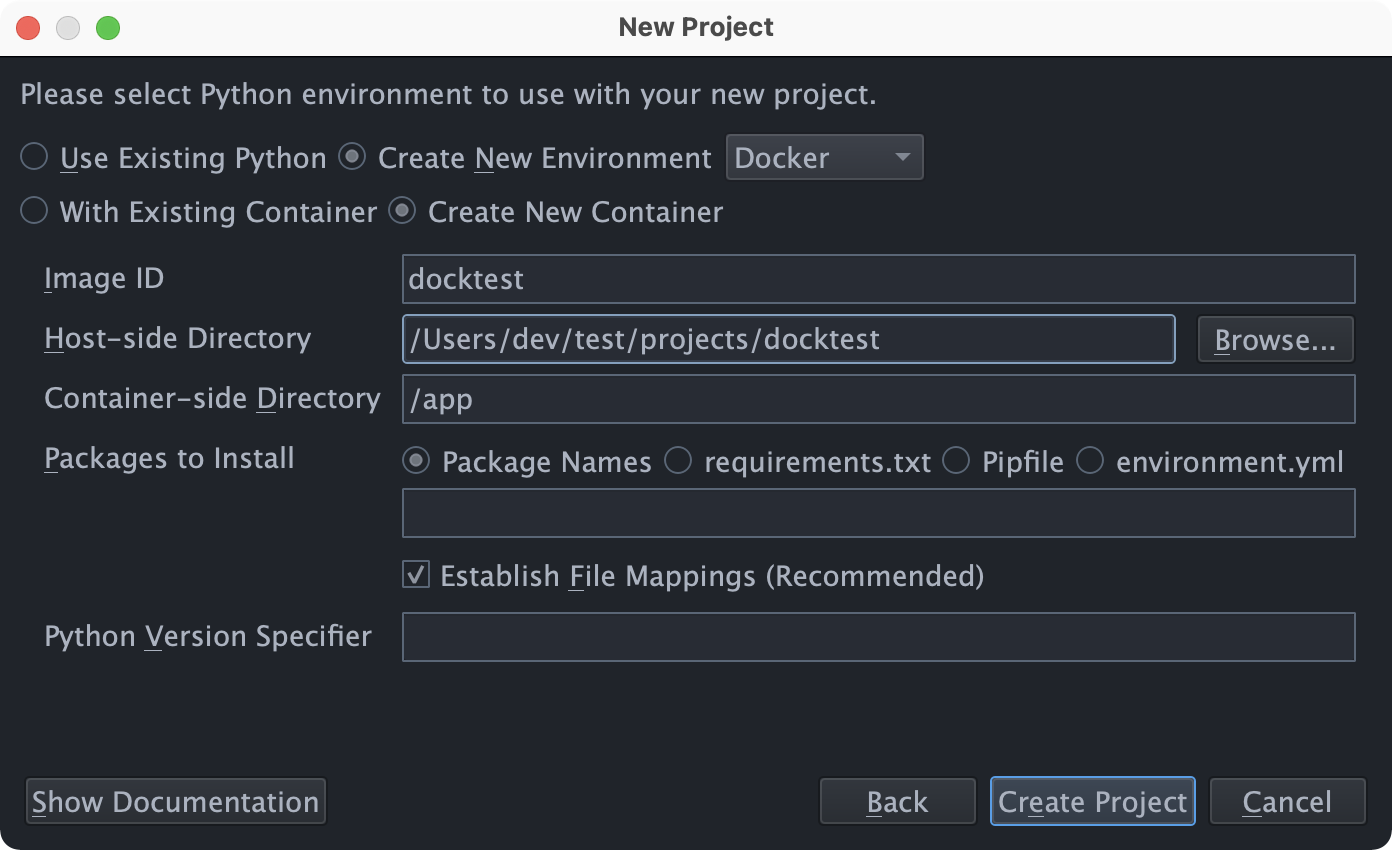
In order to experiment with Docker, the easier of these two options is to create a new Docker container along with your project. To do this, choose New Project from the Project menu, select or create a source directory, and then on the second dialog screen choose Create New Environment with environment type Docker and Create New Container. You should be able to use the default values entered for Image ID, Host-side Directory, and Container-side Directory and simply go ahead with the environment and project creation by pressing Create Project:

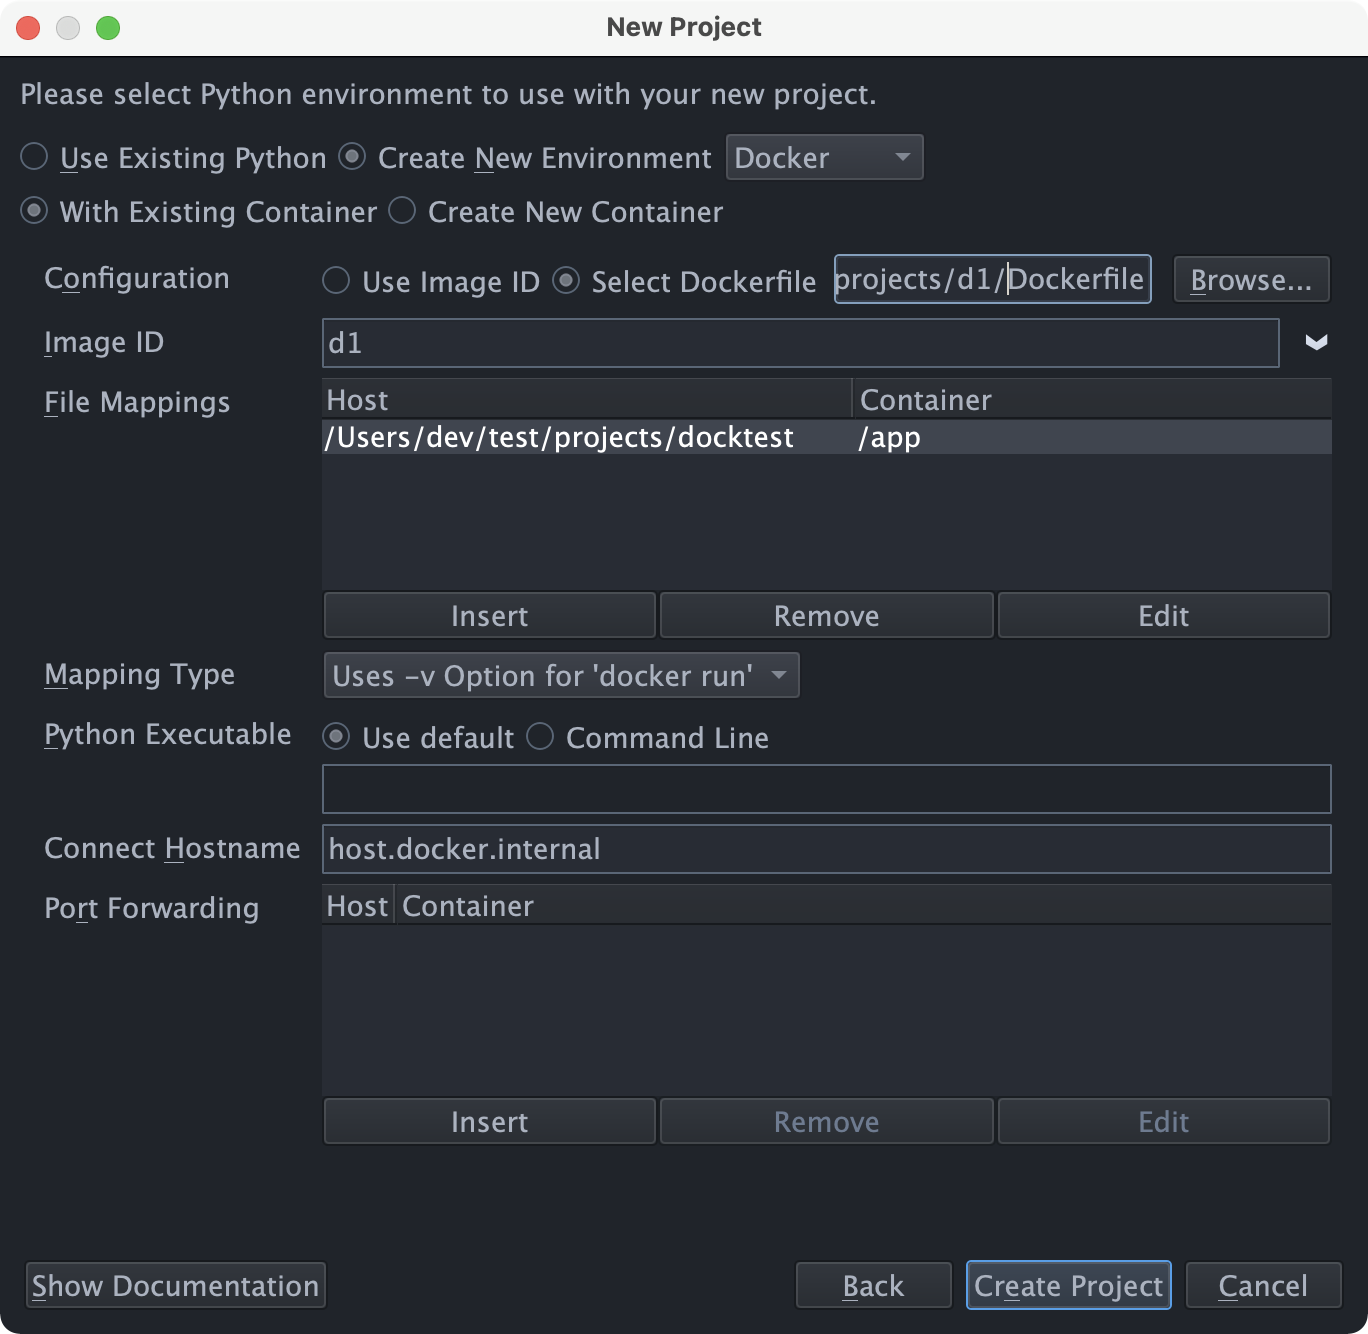
If you want to use an existing Docker container configuration instead, create a new project with New Project in the Project menu, select or create a source directory, and then on the second dialog page select Create New Environment with environment type Docker and With Existing Container. You will need to enter at least the container image and host-to-container file mapping. In most cases, selecting a Dockerfile is easier than entering and image ID, since this also reads the host to container file mapping from the Dockerfile:

Both of these options create a new container configuration and set up Python Executable in your new project's Project Properties to use that container. You can make later changes to your configuration from there.
If you created a new Docker container, it will be built in the Containers tool, which is available in Wing's Tools menu. The container won't be ready for use until that process completes. This may take some time if container images are being downloaded.
How it Works
Once your project setup is complete and the Docker container has been built, Wing will run debug processes, unit tests, and the Python Shell on an instance of the selected container. Filenames are mapped automatically between the local and container-side copy of files. The debugger will display the local file even though the container's copy of the file is being executed.
OS Commands can optionally run commands on the container or on the local host. This is controlled by toggling the Run in Container option in the OS Command configuration.
Note that each debug process, each unit test run, and each instance of the Python Shell creates its own independent instance of the container.
Further Reading
For more detailed instructions for setting up Wing Pro with Docker, see Using Wing Pro with Docker.
For more information on Wing's support for containers in general, see Working with Containers and Clusters.
That's it for now! We'll be back soon with more Wing Tips for Wing Python IDE.
As always, please don't hesitate to email support@wingware.com if you run into problems or have any questions.
Share this article:


