Wing Tips: Using virtualenv, Poetry, pipenv, and Anaconda environments with Wing Python IDE
Last time we looked at how to create projects in Wing. In this Wing Tip let's look more closely at how to configure your project to use or create Python environments managed by virtualenv, Poetry, pipenv, or Anaconda.
Configuring an Existing Project
For an existing Wing project, you can specify an environment as the Python Executable in Project Properties (from the Project menu) in one of two ways:
(1) Select Activated Env and enter the full path to the environments activation script. This is the activate or activate.bat associated with the environment:

The drop down menu next to the entry area lists discovered environments and those which have been used recently:

or (2) Select Command Line and enter the full path to the environment's python or python.exe. This executable both activates the env and runs Python, so all the code Wing launches will run in the environment:

When in doubt about which path to use, run your environment outside of Wing and inspect the value of sys.executable after import sys. That is the value you want to use.
Activated environments can be used in the same way in other settings where a Python Executable can be specified, for example for Launch Configurations and in a Remote Host configuration.
Creating a New Project
There are two options available for environments, when starting a new project from the Project menu: (1) Creating a new enviroment and new Wing project at the same time, or (2) Creating a new Wing project that uses an existing environment.
Creating a New Environment
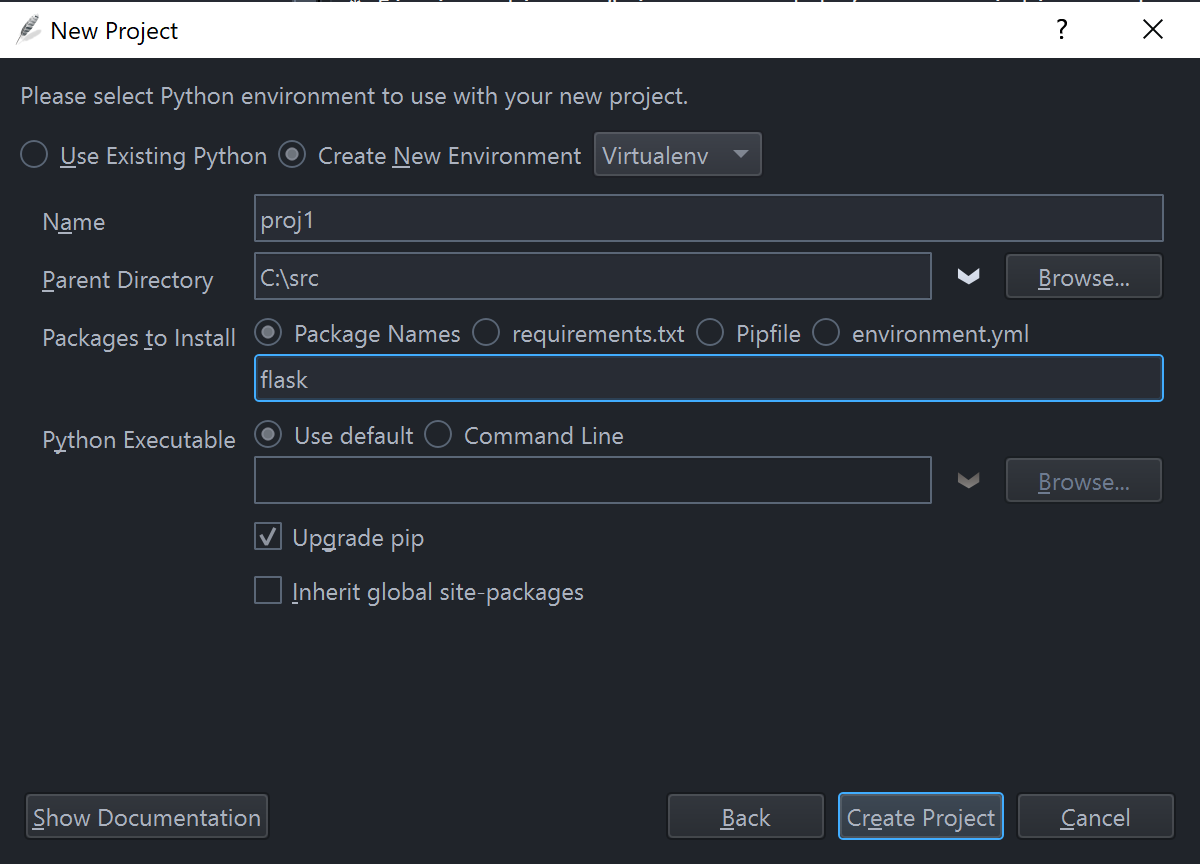
To create a new environment along with your project, select New Project from the Project menu, select or create your source directory, and press Next. On the second screen, choose Create New Environment and select the type of environment you wish to create. You will then need to enter the name for the environment, select a parent directory, and optionally specify packages to install and/or the base Python Executable to use. For example:

The options to enter vary slightly by type of environment being created. For example, Poetry and pipenv use the selected source directory and does not need environment name and parent directory. Also, Anaconda environments require that you install at least one package.
When you press Create Project, Wing will create the environment, install packages, and then configure and save a project file. You can immediately start working in your new environment, which Wing automatically activates for you whenever you have the project open.
Using an Existing Environment
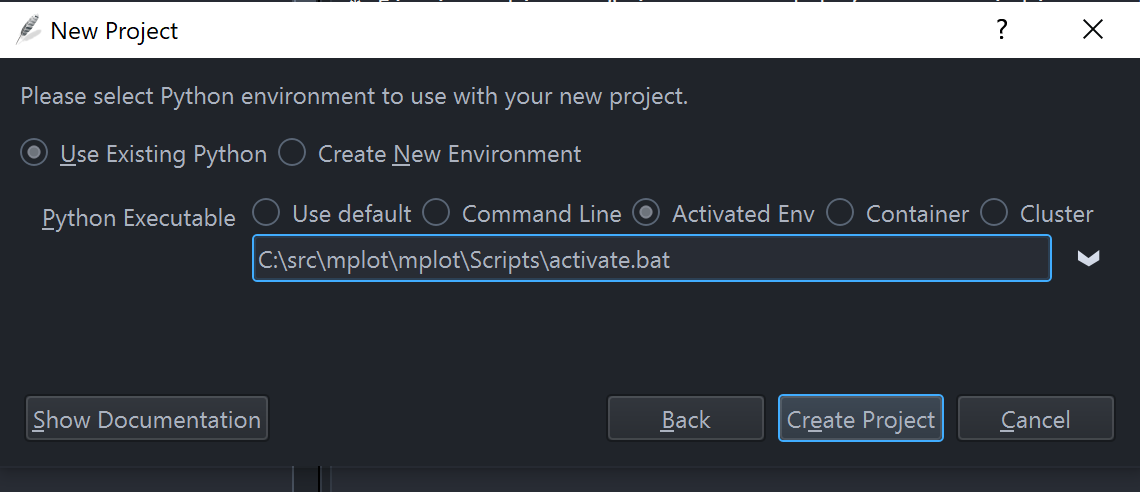
To use an existing virtualenv or Anaconda environment, select New Project from the Project menu, select or create your source directory, and press Next. On the second screen, select Use Existing Python and select Activated Env under Python Executable. You can then select a recent or found environment from the drop down or manually enter your activation command:

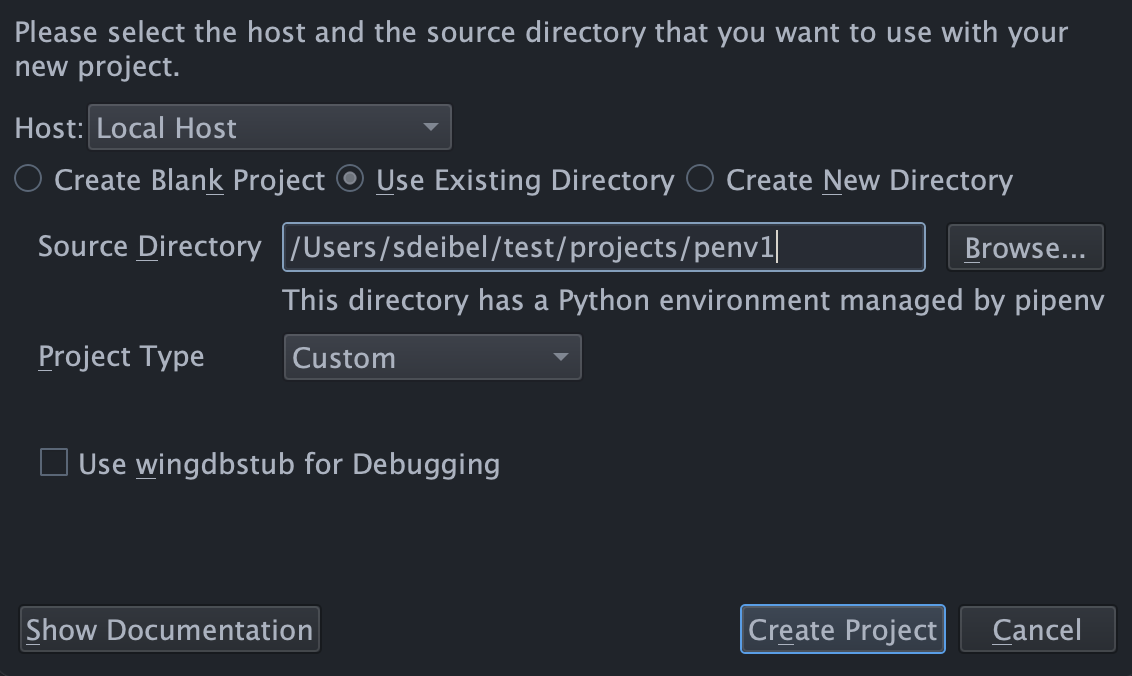
To use an existing Poetry or pipenv directory, you instead simply select Use Existing Directory in the New Project dialog and Wing will auto-detect that this directory already contains a Poetry or pipenv environment to use with the project:

In this case, Wing immediately displays the Create Project button and will use that environment with your project.
Notes
Once your project has been set up, you can use the Packages tool in the Tools menu to add, remove, or upgrade packages in your Python environment. We'll describe this in more details the next Wing Tip, or see Package Manager for details.
For some additional details on each type of environment, see Using Wing with virtualenv, Using Wing with pipenv, Using Wing with Poetry, and Using Wing with Anaconda.
That's it for now! We'll be back soon with more Wing Tips for Wing Python IDE.
As always, please don't hesitate to email support@wingware.com if you run into problems or have any questions.
Share this article:


